
Before we learn how to create a custom taxonomy in WordPress, in this article we will learn one by one what taxonomy is in WordPress, what is default taxonomy, and why we need to create custom taxonomy.
Table of Contents
What is taxonomy in WordPress?
We can group articles or posts in WordPress through taxonomy. Categories and tags are one of the default taxonomies in WordPress. So, by default In WordPress we can assign categories and tags to an article through which we can easily group the articles and navigate the articles easily.
What are the types of taxonomy in WordPress?
There are a total of four types of default taxonomies in WordPress. We will know these taxonomies one by one.
Category
Category is a default hierarchical taxonomy of WordPress.
Hierarchical here means categories can have parent child relationship.
For example if cricket is a category item then test cricket or one day cricket or t20 cricket can be a child category.
After logging into admin section of WordPress we can add categories in two ways.
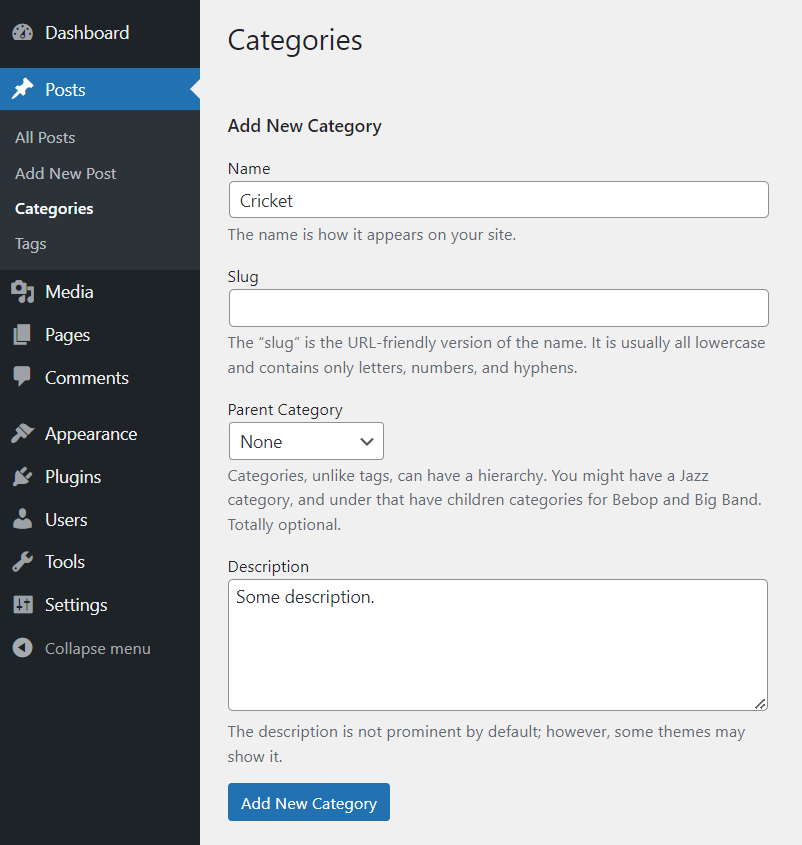
The first method is to navigate to Post->Categories from the left side menu and then add data to the page that opens and click on the Add New Category button. The screenshot is given below.
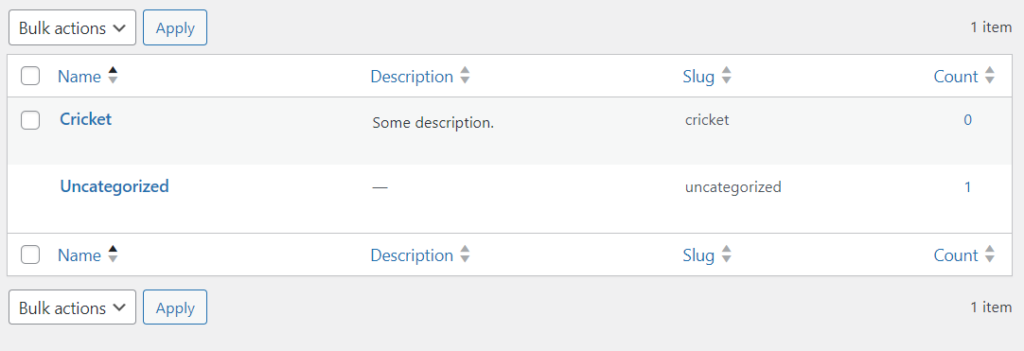
Now we will see that Cricket is added. The screenshot is given below.
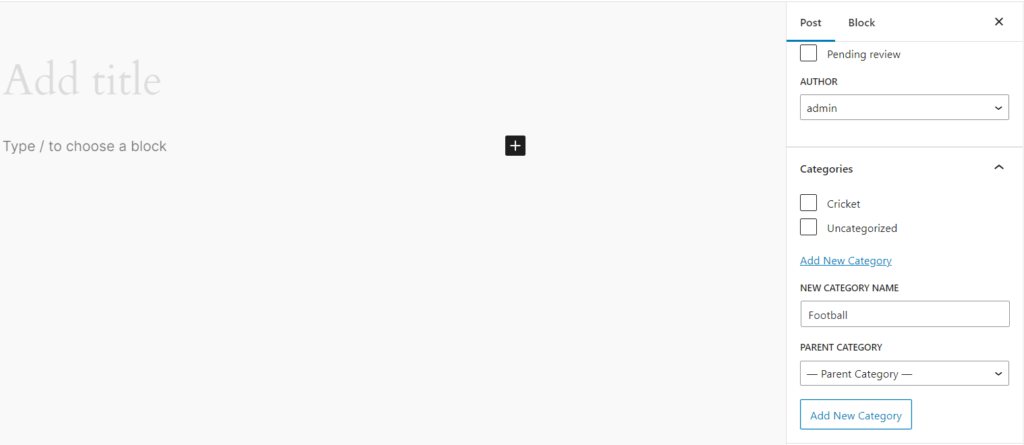
The second method is to click on Posts->Add New Post and then add a category from the panel on the right side of the visual editor. The screenshot is given below.
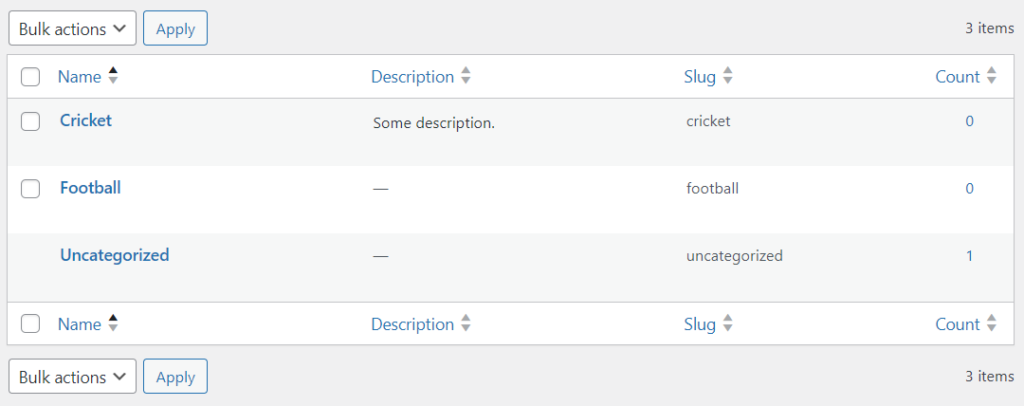
If we navigate to the Posts->Categories, we can see that the new category has been added. The screenshot is given below.
Another important thing here is that we have not added the Uncategorized category, but we can see it in the screenshot, the reason is that the Uncategorized category is added as soon as WordPress is installed.
If we don’t check a category while adding a post then the post goes under the default Uncategorized category. That is, there must be a category in any post. We cannot delete the Re Uncategorized category but we can edit it
I have previously written an article on how to create a custom template pages for categories in WordPress. Its URL is: https://webtechbased.com/how-to-create-a-category-template-in-wordpress/
Tag
Tags are another default taxonomy of WordPress. Like categories it groups the articles or posts of a blog. The basic difference between tags and categories is that tags are non-hierarchical, meaning no other tag can be added under a tag. Another difference is that in a WordPress post, categories are mandatory (by default Uncategorized ) but tags are not.
Where a post is written based on a category, the tag concentrates on the post’s smaller details. For example, if we write an article on a football match and if it is a Premier League match, we can consider football as a category and Premier League as a tag for that post.
Tags can be added in two ways from the admin panel of WordPress like categories. The first method is the same as the first method of adding categories and the method is to navigate to Post->Tags from the left side menu and then add data to the page that opens and click on the Add New Tag button. The screenshot is given below.
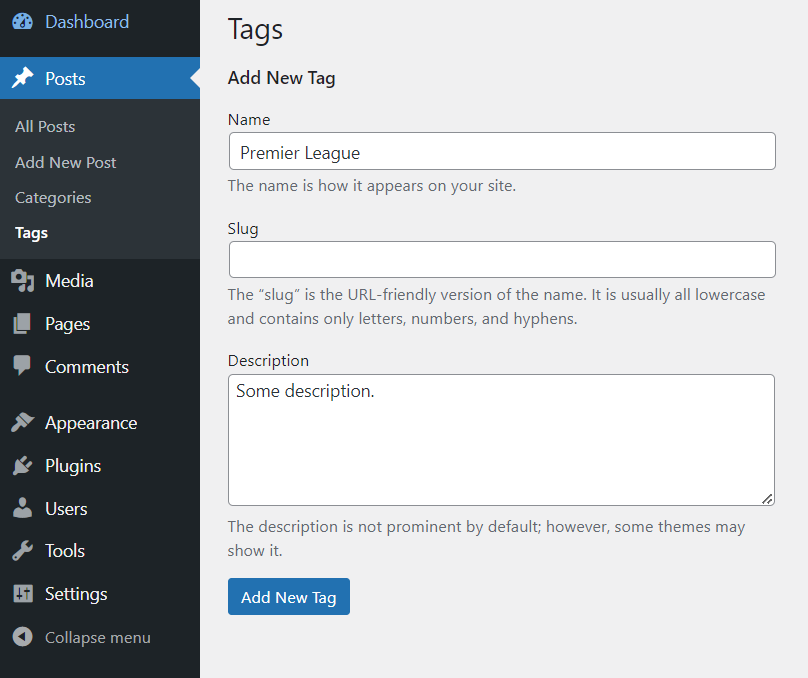
This will add Premier League tag. The screenshot is given below.
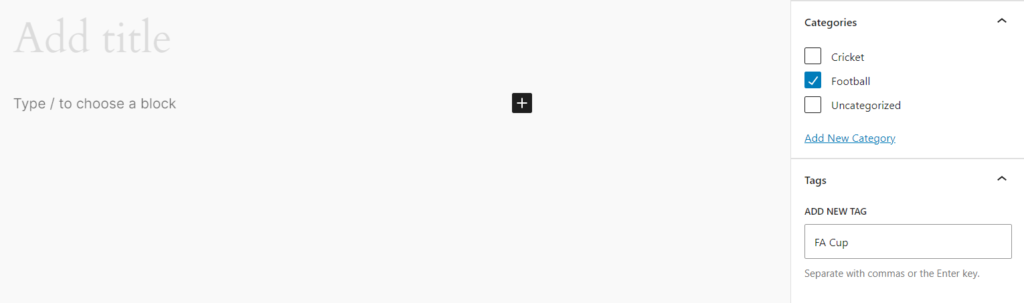
The second method of adding tags is the same as the second method of adding categories and the method is to click on Posts->Add New Post and then add a tag to input field and press enter button from the panel on the right side of the visual editor. The screenshot is given below.
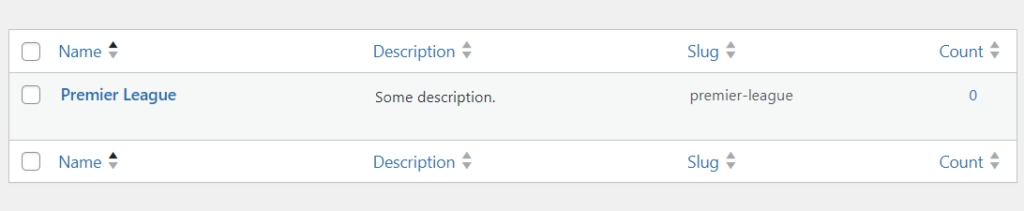
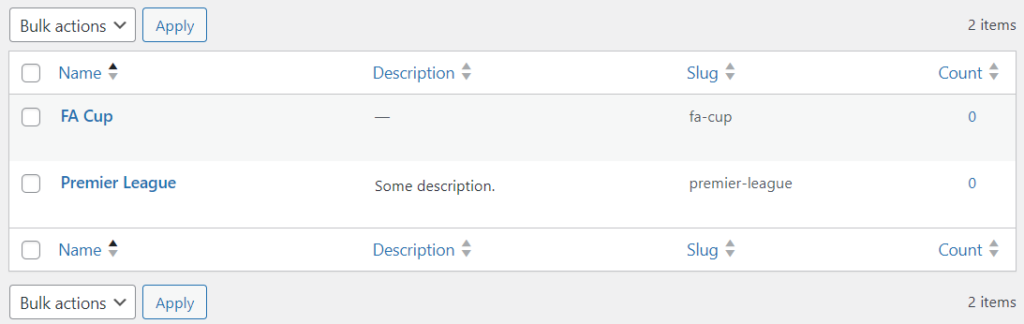
Now if we navigate to the Posts->Tags, we can see that the new tag has been added. The screenshot is given below.
Apart from category and tag, WordPress has two default taxonomies that are not visible to visitors. These two are link_category, and post_format.
Link_category
We can categorize links using link_category taxonomy.
Post_format
This allows us to categorize our posts based on the types.
Why we need to create custom taxonomy in WordPress?
Now the question is, if we can easily group an article through categories and tags, why do we need a custom taxonomy?
We will try to understand this with examples. We have seen above that we have added sport related categories like Cricket, Football and added tags like Premier League, FA Cup. Now, if we write a post or article on a cricket or football match, we can easily manage it with just categories or posts.
But here if we want to write a product review on a sport product such as jersey, cap, then it can be difficult to manage with the above categories or tags. In that case we will create a hierarchical custom taxonomy named product-type (like category) and a non-hierarchical taxonomy named product-size (like tag).
How to create a custom taxonomy in WordPress?
We can add custom taxonomy in two ways. One is by writing custom code and the other is using an already created plugin.
Writing custom code
We can write the required code in the functions.php file of the currently active theme or create a plugin and write the required code in it. Since plugins are very easy to activate and deactivate, I prefer to use plugins instead of writing code in functions.php.
How to create a custom plugin in WordPress?
First we will create a plugin by following the steps below.
- Open the plugins directory inside the wp-content directory in the path where WordPress is installed.
- Create a new directory in wp-content/plugins and name it like plugin-. We can create a directory named plugin-sports-taxonomy.
- Create a new PHP file in newly created directory that is plugin-sports-taxonomy and name it like plugin-sports-taxonomy.php.
- Now in the comments at the top of this file, write the information Plugin Name, Description, Version, Author, Author URI.
- For example, it can be written like this:
<?php
/*
* Plugin Name: Sports Taxonomy
* Description: Sports Taxonomy Plugin Related Description
* Version: 1.0
* Author:
* Author URI:
*/
Now let’s write the required code in this plugin file to create a custom taxonomy.
For this we need to use the register_taxonomy function. You can learn the details about the register_taxonomy function at: https://developer.wordpress.org/reference/functions/register_taxonomy/.
Also we need to use init hook in add-action function. You can learn the details about the add_action function at: https://developer.wordpress.org/reference/functions/add_action/. You can find the details about init hook at: https://developer.wordpress.org/reference/hooks/init/.
The final code of the plugin-sports-taxonomy.php file to create these two custom taxonomies product-type, product-size is:
<?php
/*
* Plugin Name: Sports Taxonomy
* Description: Sports Taxonomy Plugin Related Description.
* Version: 1.0
* Author: Dev
* Author URI:
*/

function register_sports_taxonomy() {
	$labels = array(
		'name'              => __( 'Product Types'),
		'singular_name'     => __( 'Product Type' ),
		'search_items'      => __( 'Search Product Types' ),
		'all_items'         => __( 'All Product Types' ),
		'parent_item'       => __( 'Parent Product Type' ),
		'parent_item_colon' => __( 'Parent Product Type:' ),
		'edit_item'         => __( 'Edit Product Type' ),
		'update_item'       => __( 'Update Product Type' ),
		'add_new_item'      => __( 'Add New Product Type' ),
		'new_item_name'     => __( 'New Product Type Name' ),
		'menu_name'         => __( 'Product Types' ),
	);
	$args   = array(
		'hierarchical'      => true, // hierarchical (like categories)
		'labels'            => $labels,
		'show_ui'           => true,
		'show_admin_column' => true,
		'show_in_rest'		=> true,
		'query_var'         => true,
		'rewrite'           => [ 'slug' => 'product-type' ],
	);
	register_taxonomy( 'product-type', [ 'post' ], $args );

	$labels = array(
		'name'              => __( 'Product Sizes' ),
		'singular_name'     => __( 'Product Size' ),
		'search_items'      => __( 'Search Product Sizes' ),
		'all_items'         => __( 'All Product Sizes' ),
		'parent_item'       => __( 'Parent Product Size' ),
		'parent_item_colon' => __( 'Parent Product Size:' ),
		'edit_item'         => __( 'Edit Product Size' ),
		'update_item'       => __( 'Update Product Size' ),
		'add_new_item'      => __( 'Add New Product Size' ),
		'new_item_name'     => __( 'New Product Size Name' ),
		'menu_name'         => __( 'Product Sizes' ),
	);
	$args   = array(
		'hierarchical'      => false, // non-hierarchical (like tags)
		'labels'            => $labels,
		'show_ui'           => true,
		'show_admin_column' => true,
		'show_in_rest'		=> true,
		'query_var'         => true,
		'rewrite'           => [ 'slug' => 'product-size' ],
	);
	register_taxonomy( 'product-size', [ 'post' ], $args );

}

add_action( 'init', 'register_sports_taxonomy' );
?>
Now if we navigate to Plugins -> Installed Plugins from WordPress admin then we can see our newly created plugin i.e. Sports Taxonomy plugin. The screenshot is attached below.
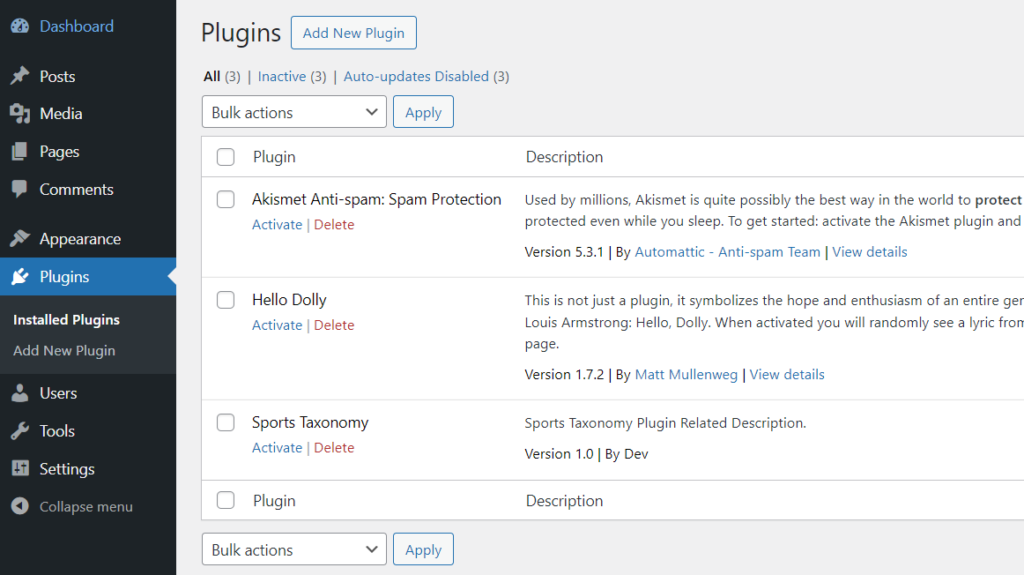
Now we can activate the Sports Taxonomy plugin. After activating plugin we can add, edit, delete Product Types and Product Sizes.
Product Types (Custom Taxonomy – Hierarchical)
We can add Product Types in two ways from the admin panel in the same way as we added the categories earlier.
The first method is to navigate to Post->Product Types and then add Product Types and click on the Add New Product Type button. The screenshot is given below.
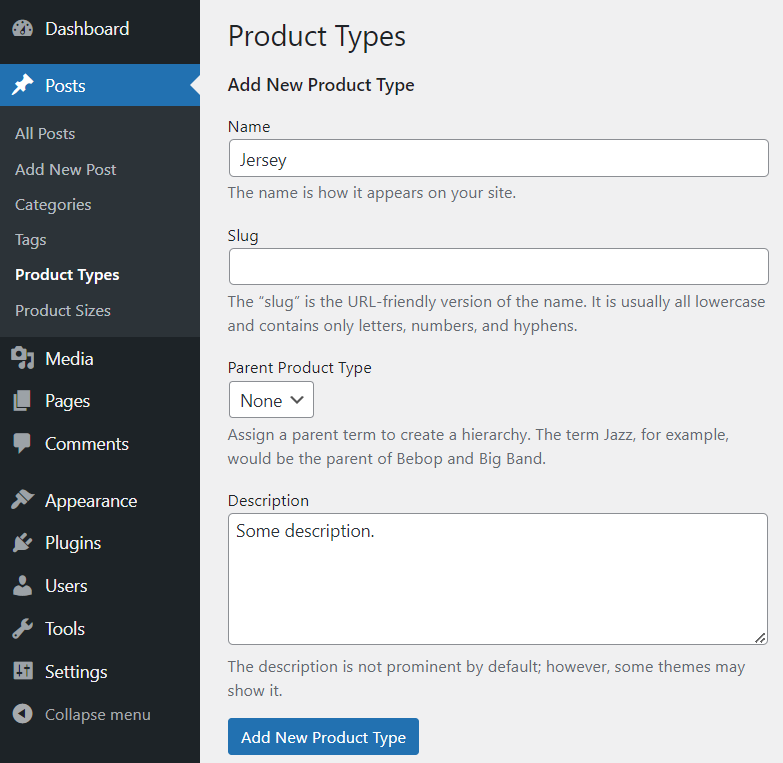
We have added the Jersey Product Type which we can see from the screenshot below.

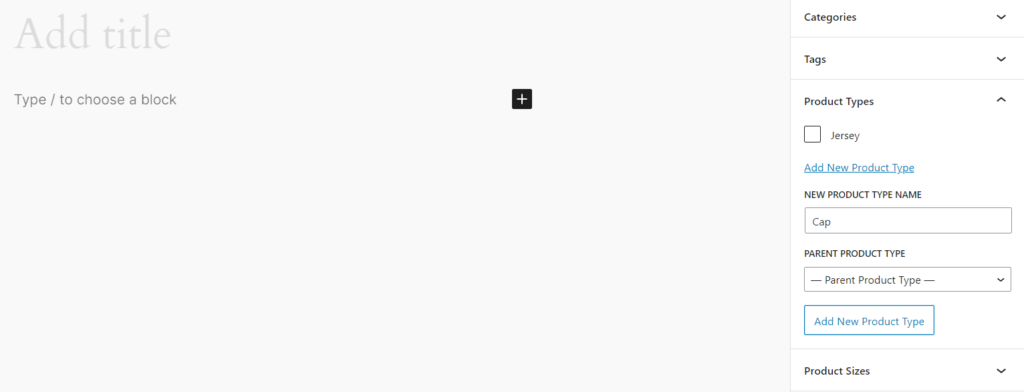
The second method is the same as the second method of adding categories, that is, from the left menu, click on Posts -> Add New Post and the page for adding new posts will open, and from the right side panel of the visual editor of this page, we can add new post types. The screenshot is given below.
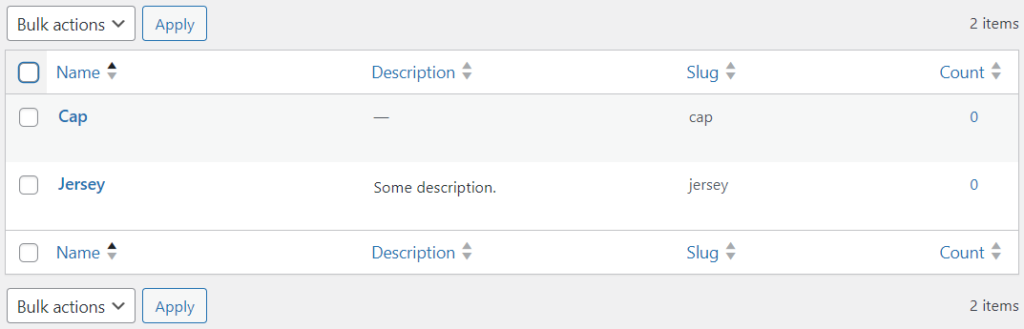
Now, If we navigate to the Posts->Product Types, we can see that the new product type has been added. The screenshot is given below.
Product Sizes (Custom Taxonomy – Non-Hierarchical)
We can add Product Sizes in two ways from the admin panel in the same way as we added the tags earlier.
The first method is to navigate to Post->Product Sizes and then add Product Sizes and click on the Add New Product Size button. The screenshot is given below.
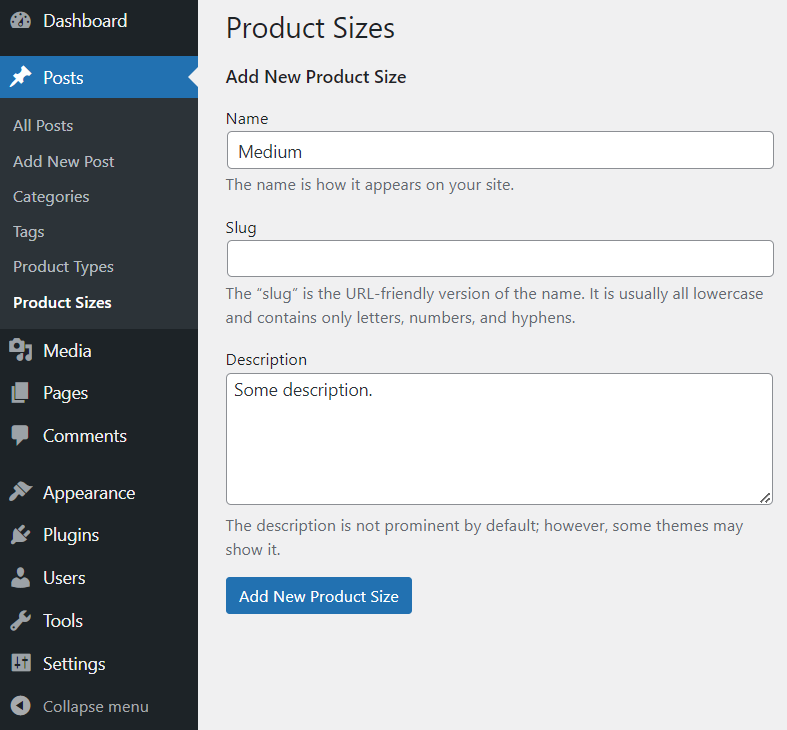
We have added the Medium Product Size which we can see from the following screenshot.

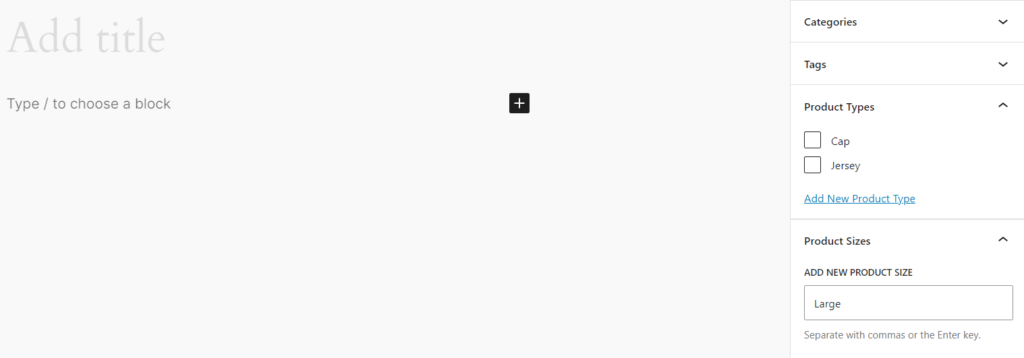
The second method is the same as the second method of adding tags, that is, from the left menu we click on Posts -> Add New Post and then from the right side panel of the visual editor, we can add new post sizes by adding a product size to input field and press enter button. The screenshot is given below.
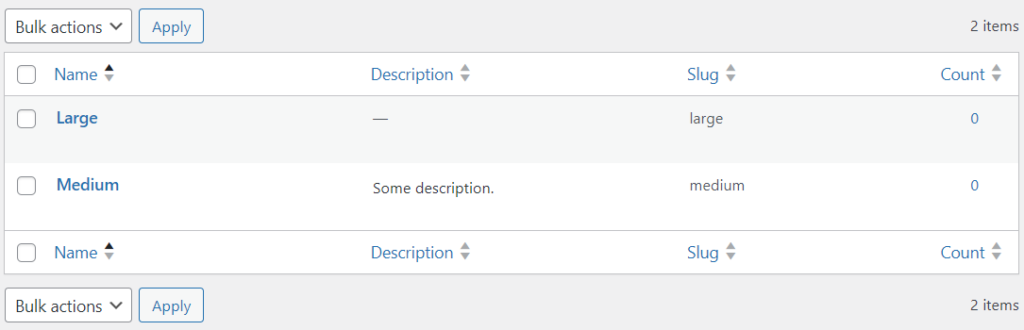
If we navigate to the Posts->Product Sizes, we can see that the new product size has been added. The screenshot is given below.
In this way we can create custom taxonomies by using our own custom plugin.
Now we will know how to create a custom taxonomy using an external plugin.
Using External Plugin
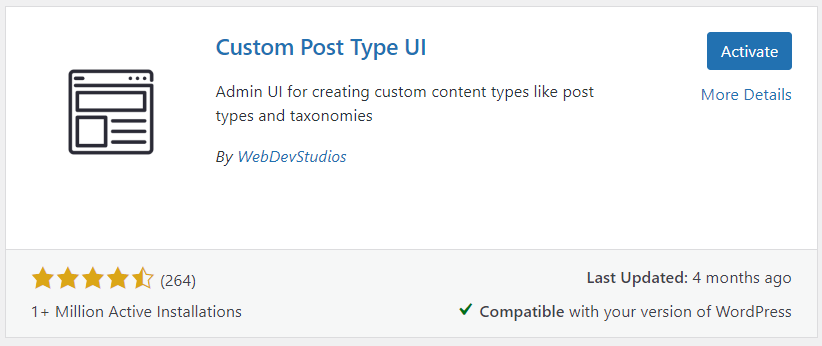
The advantage of using the plugin is that it does not require any technical knowledge. We can use a plugin like Custom Post Type UI here. This is a popular plugin as we can see from the number of downloads of this plugin. We will install this plugin first and then activate it.
How to install a plugin in WordPress?
For this we need to navigate to Plugins -> Add New Plugin from the left menu of the admin section. We will first search by entering the name of the plugin in the search plugin input box. Here our plugin is Custom Post Type UI. Then we will install it by clicking the Install Now button. After that we will activate the plugin by navigating to Plugins -> Add New Plugin. Screenshots are attached below.


We will use this plugin to create a hierarchical taxonomy named product-material and a non-hierarchical taxonomy named product-color.
Product Material (Custom Taxonomy – Hierarchical)
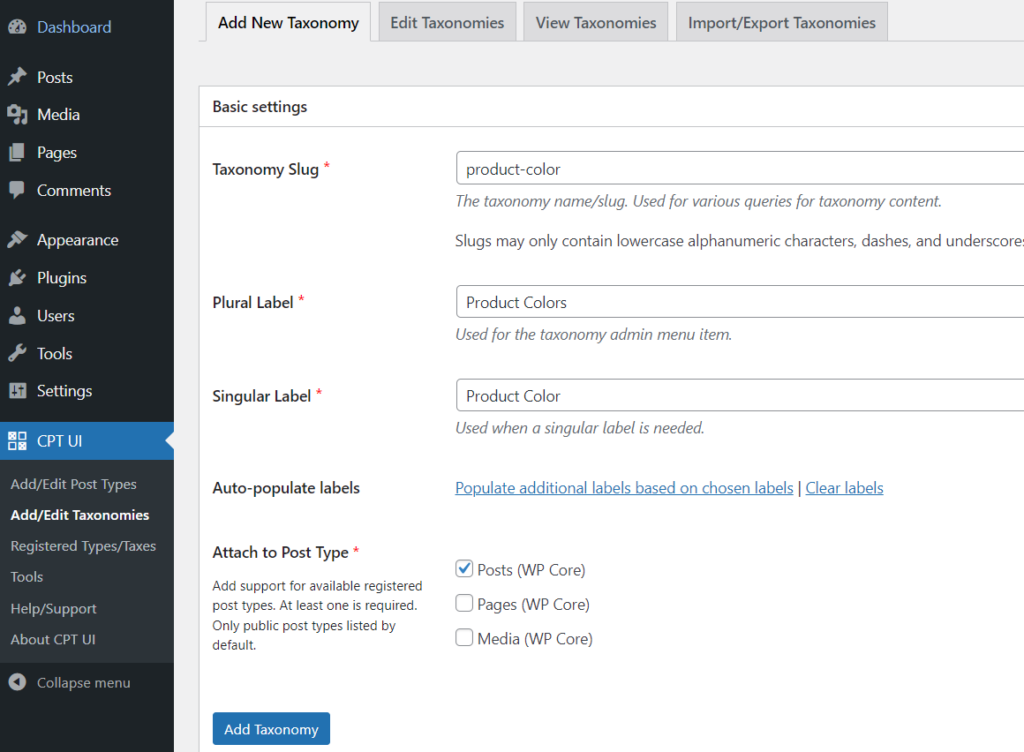
We will first add non-hierarchical taxonomy by navigating to CPT UI -> Add/Edit Taxonomies. Screenshot is attached below.
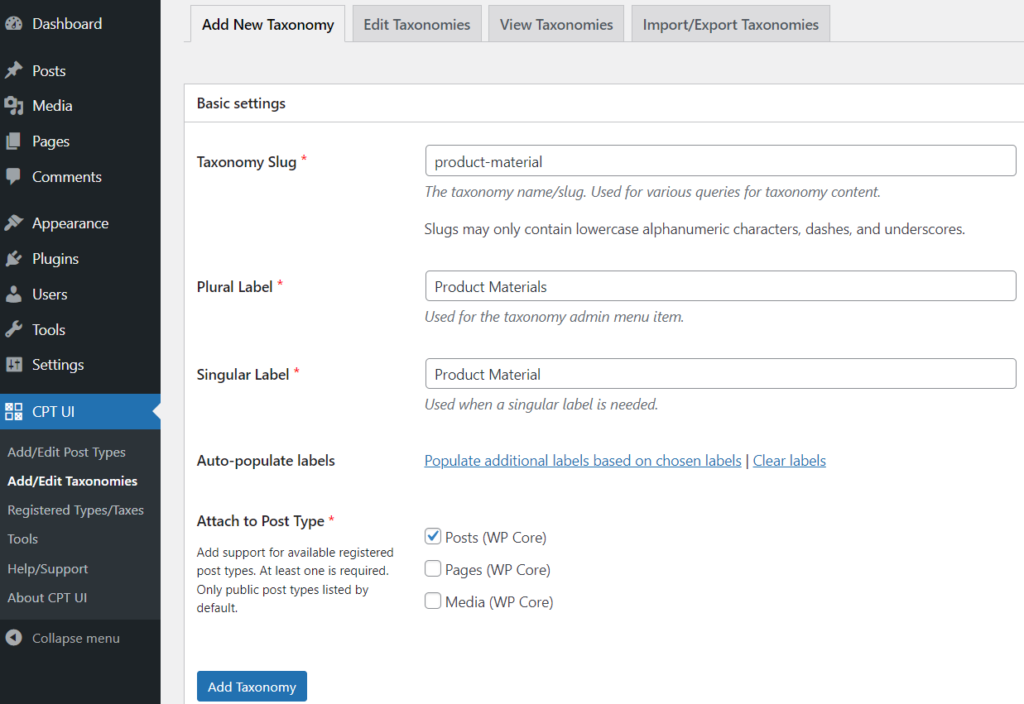
We will click ‘Populate additional labels based on chosen labels’ link to to Auto-populate labels Otherwise we have to add the labels manually.
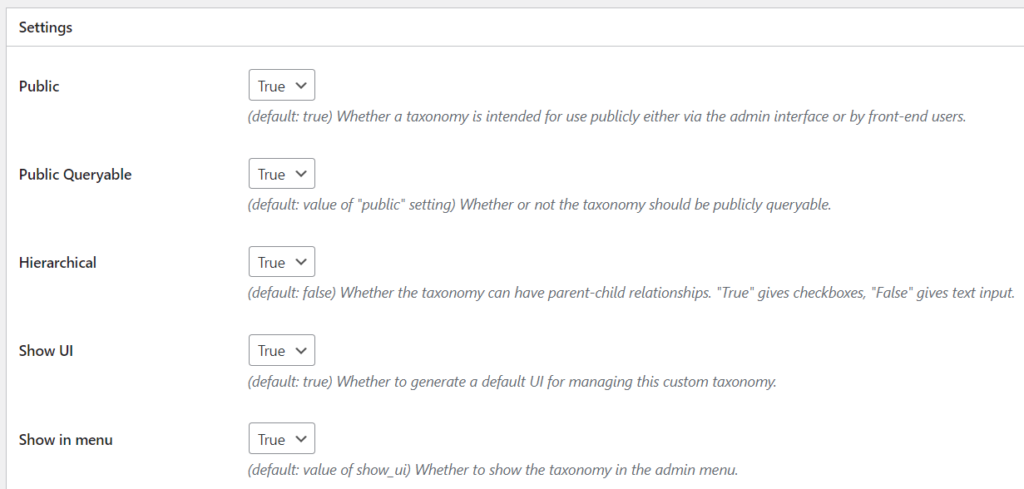
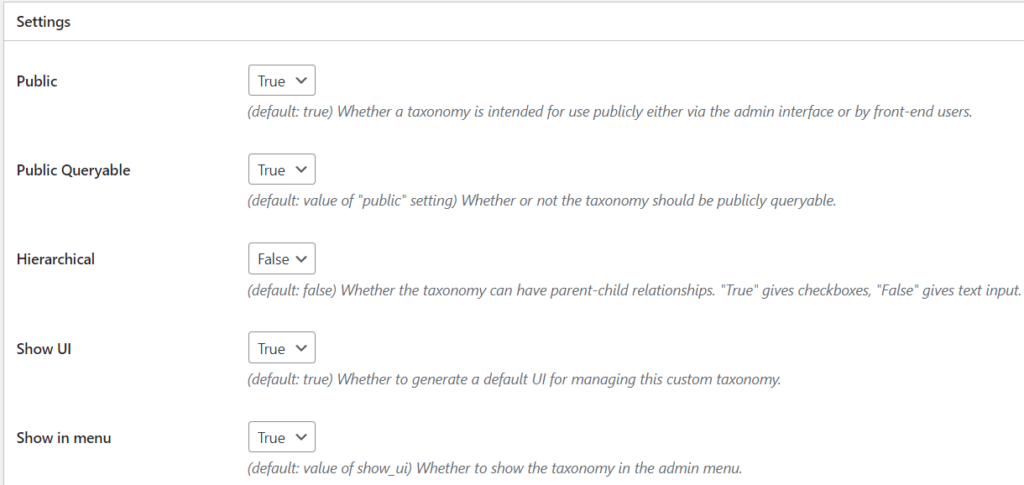
At the bottom of this page, under Settings, the Hierarchical field will be set to true as shown in the following screenshot.
Now at the very bottom of this page there is Add Taxonomy button and clicking on this button will create a product taxonomy.
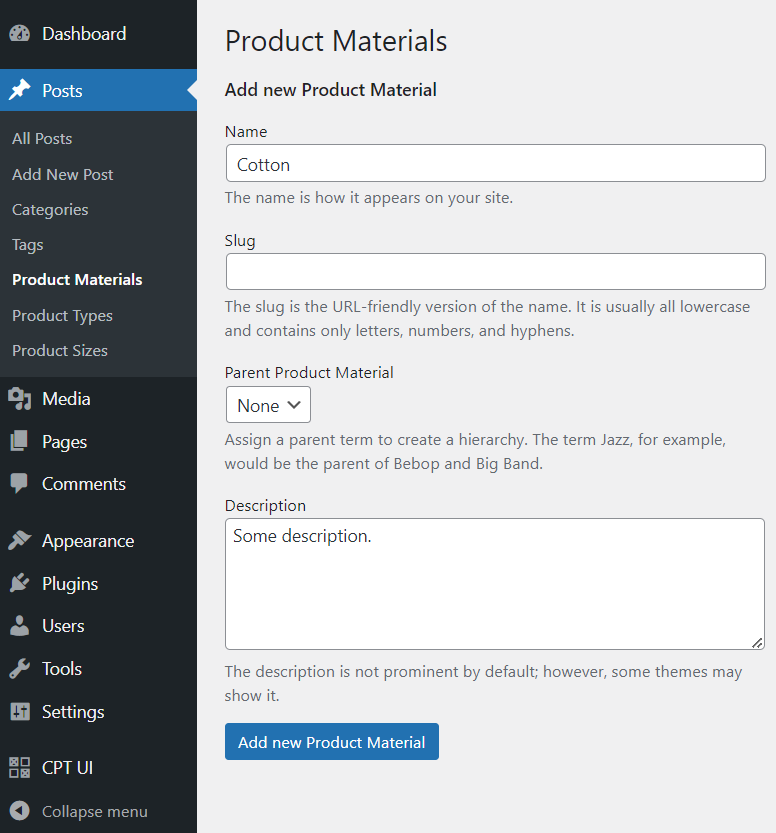
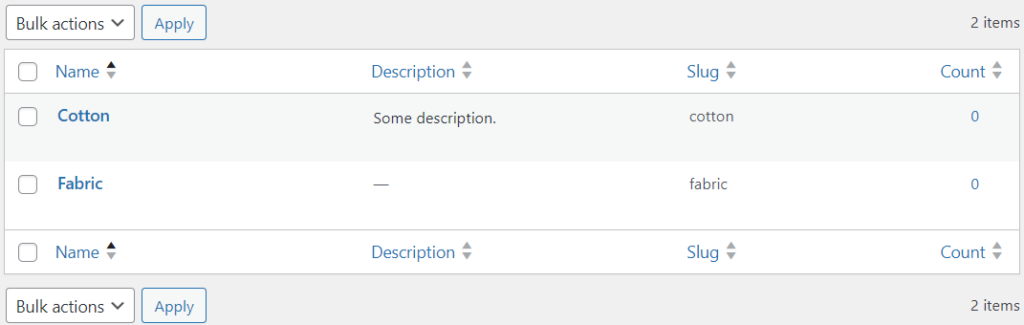
As we have previously added the data of a taxonomy, now we can add Product Materials by navigating to Posts -> Product Materials. The screenshot is given below.
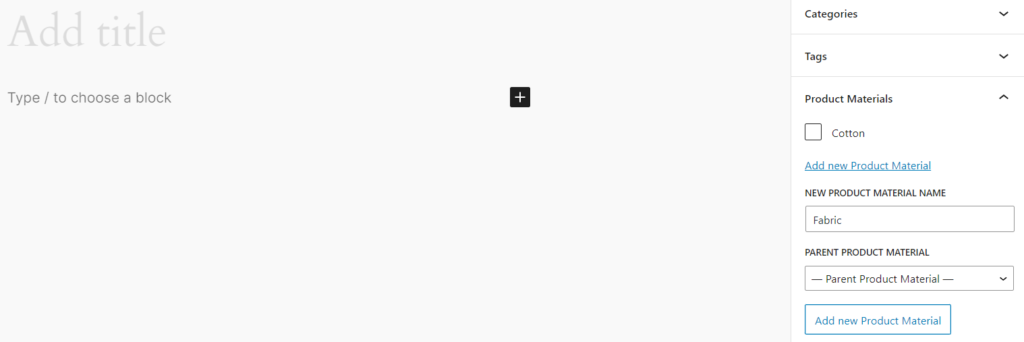
We can add new Product Material from the block on the right side of the editor after clicking Posts -> Add New Post, as we did earlier. The screenshot is given below.
We can get Product materials after clicking Posts -> Product Materials. The screenshot is given below.
Product Sizes (Custom Taxonomy – Non-Hierarchical)
Similarly, if we want to create a non-hierarchical taxonomy using this plugin, we will navigate to CPT UI -> Add/Edit Taxonomies in the same way and then create a taxonomy named product-color. We will click ‘Populate additional labels based on chosen labels’ link to to Auto-populate labels. Under the settings of this page, we will set the Hierarchical option to false. The screenshots are given below.
Similarly we can add product color. we can add Product Colors by navigating to Posts -> Product Colors. The screenshot is given below.
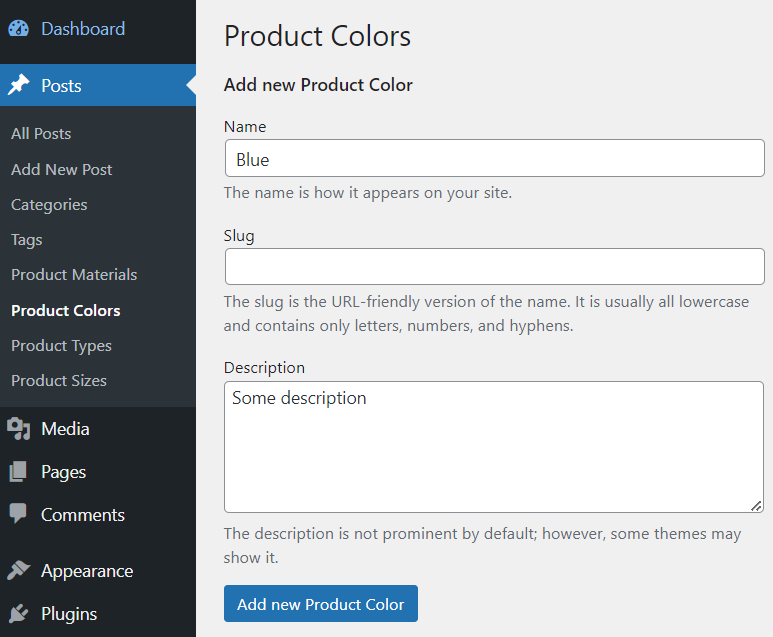
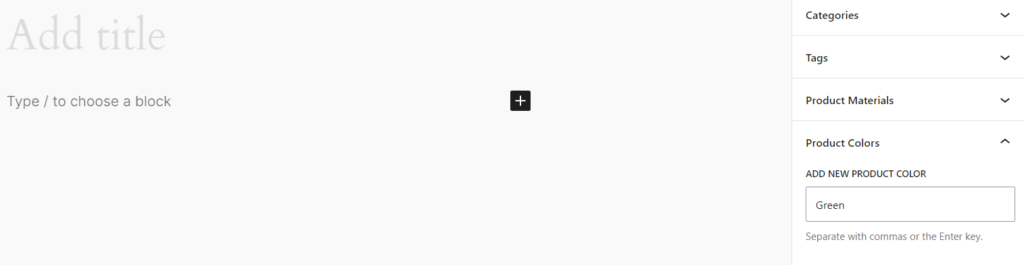
We can add new Product Color from the block on the right side of the editor after clicking to Posts -> Add New Post. The screenshots is given below.
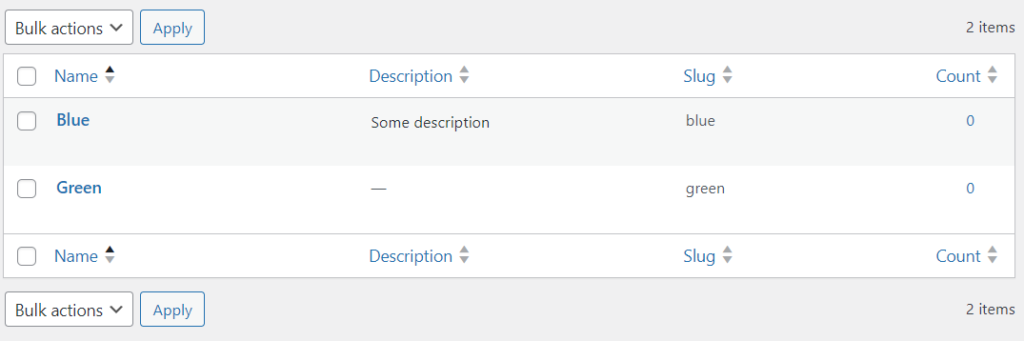
We can get Product color after clicking Posts -> Product Colors. The screenshot is given below.
This way we can create custom taxonomy using our own plugin or an external plugin.